Including Google Maps with angular-ionic framework to MAF application
Now, I will show you how to create a MAF application with several APIs in few steps. There we go:
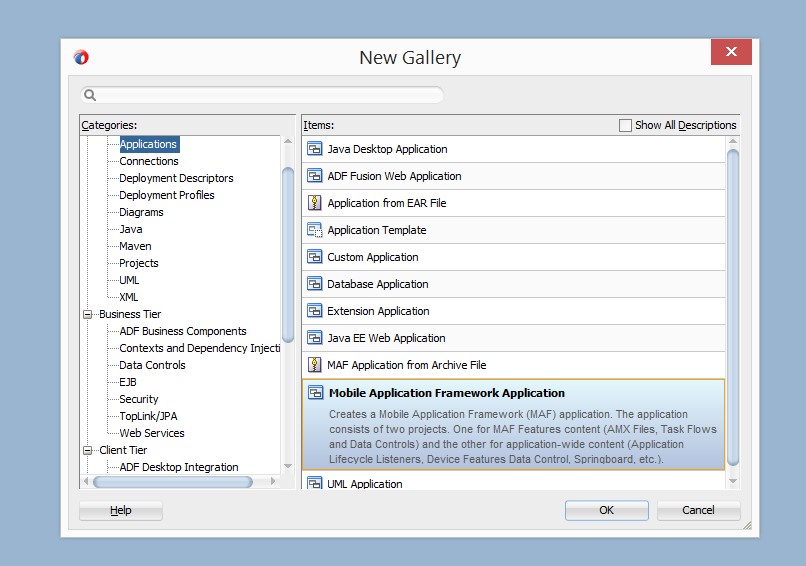
I. Create a MAF application, you can put a name that you want and go finish.
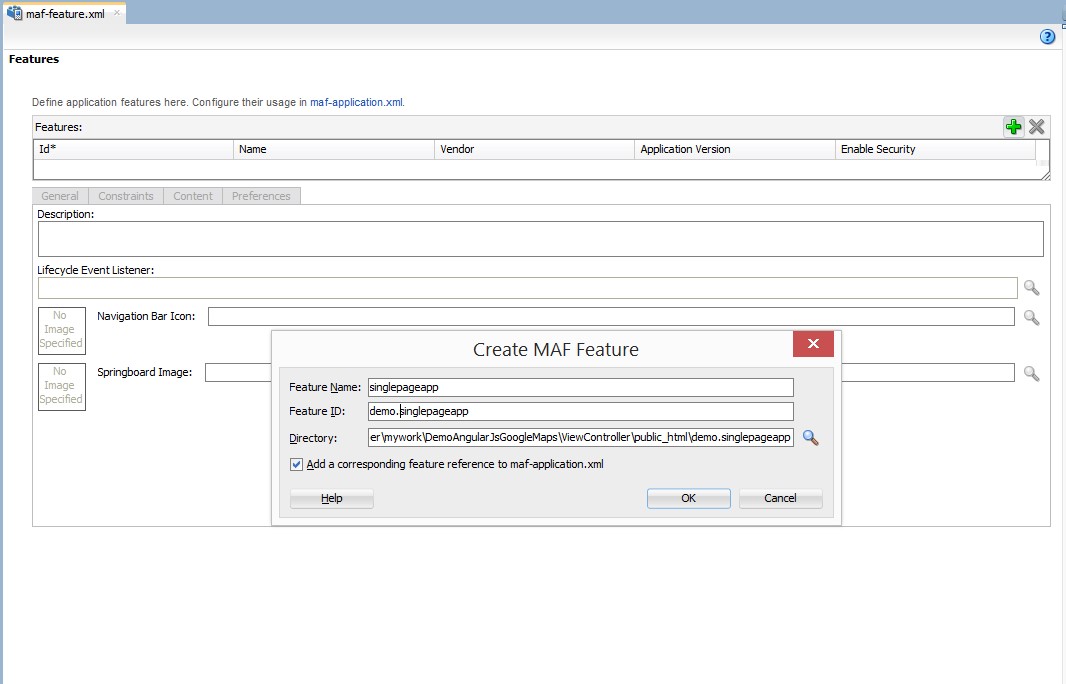
II. Then we have to define the feature in maf-feature.xml similar to the image bellow.
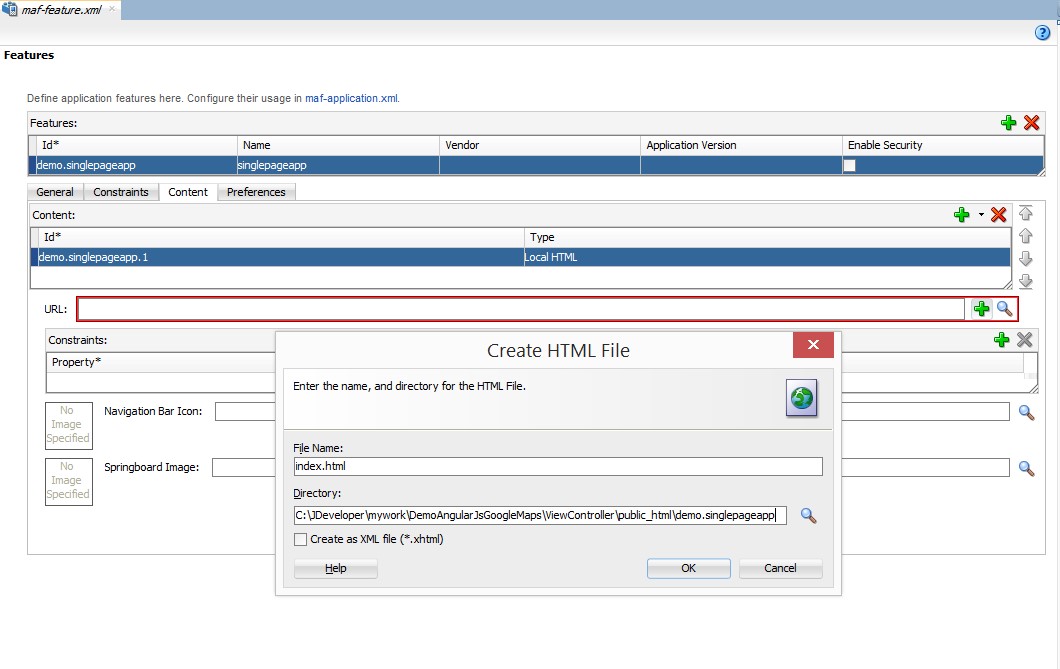
III. Now we have to click on content tab then select Local HTML for the type and define a html page. In this sample is Index.html.
IV. Inside of index.html we have to change the content by the code below We are including angular-ionic framework and google maps api.
<!DOCTYPE html>
<html>
    <head>
        <meta charset="utf-8"/>
        <meta name="viewport" content="initial-scale=1, maximum-scale=1, user-scalable=no, width=device-width"/>
        <title></title>
        <link href="lib/ionic/css/ionic.css" rel="stylesheet"/>
        <link href="css/style.css" rel="stylesheet"/>
        <script type="text/javascript">
          if (!window.adf)
              window.adf = {
              };
          adf.wwwPath = "../../../../www/";
        </script>
        <script type="text/javascript" src="../../../../www/js/base.js"></script>
        <!-- ionic/angularjs js -->
        <script src="lib/ionic/js/ionic.bundle.js"></script>
        <!-- your app's js -->
        <script src="js/app.js"></script>
        <script src="js/controllers.js"></script>
        <script src='http://maps.googleapis.com/maps/api/js?&sensor=true'></script>

    </head>
    <body ng-app="starter">
        <ion-nav-view></ion-nav-view>
    </body>
</html>
V. Now we need to download the angular-ionic framework and include the folders (css, img, js, lib and templates) in the demo.singlepageapp folder as the image bellow.
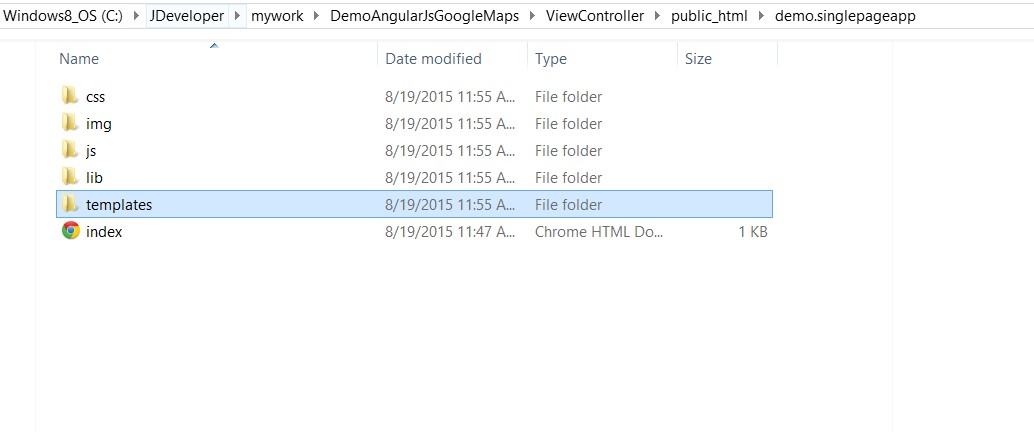
VI. If we refresh the application, we can get a new structure in the viewController.
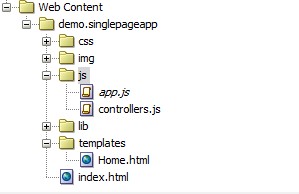
VII. In the templates folder we have the first page (Home.html) to show the map. It is using a ng-controller called MapController that has been implemented in controller.js file.
<ion-view view-title="Google Maps V3 example">

    <ion-content ng-controller="MapController">

       <div id="map" data-tap-disabled="true" ></div>
    </ion-content>
</ion-view>
VIII. Now we have to define the style of the map in the css folder as the image bellow
.scroll {
    height: 100%;
}

#map {
    width: 100%;
    height: 100%;
}
IX. In the js folder we have app.js that manages the logic of all the pages. In this case we are defining the Home.html with its controller called HomeCtrl.
// Ionic Starter App

// angular.module is a global place for creating, registering and retrieving Angular modules
// 'starter' is the name of this angular module example (also set in a <body> attribute in index.html)
// the 2nd parameter is an array of 'requires'
// 'starter.controllers' is found in controllers.js
angular.module('starter', ['ionic', 'starter.controllers'])

.run(function($ionicPlatform) {
  $ionicPlatform.ready(function() {
  });
})

.config(function($stateProvider, $urlRouterProvider) {
  $stateProvider
    .state('home', {
      url: "/home",
      templateUrl: "templates/Home.html",
      controller: 'HomeCtrl'

    })

  // if none of the above states are matched, use this as the fallback
  $urlRouterProvider.otherwise('/home');
});
X. In the controllers.js file we have all the controllers defined for the application, one of them is MapController that was defined in Home.html. In this part we have to initialize the map and find the geolocation of the mobile.
angular.module('starter.controllers', [])

.controller('AppCtrl', function($scope) {

})
.controller('HomeCtrl', function($scope, $http) {

})
.controller('MapController', function($scope, $ionicLoading) {

        var myLatlng = new google.maps.LatLng(37.3000, -120.4833);
        var mapOptions = {
            center: myLatlng,
            zoom: 16,
            mapTypeId: google.maps.MapTypeId.ROADMAP
        };
        var map = new google.maps.Map(document.getElementById("map"), mapOptions);
        navigator.geolocation.getCurrentPosition(function(pos) {
            map.setCenter(new google.maps.LatLng(pos.coords.latitude, pos.coords.longitude));
            var myLocation = new google.maps.Marker({
                position: new google.maps.LatLng(pos.coords.latitude, pos.coords.longitude),
                map: map,
                title: "My Location"
            });
        });
        $scope.map = map;

})
;
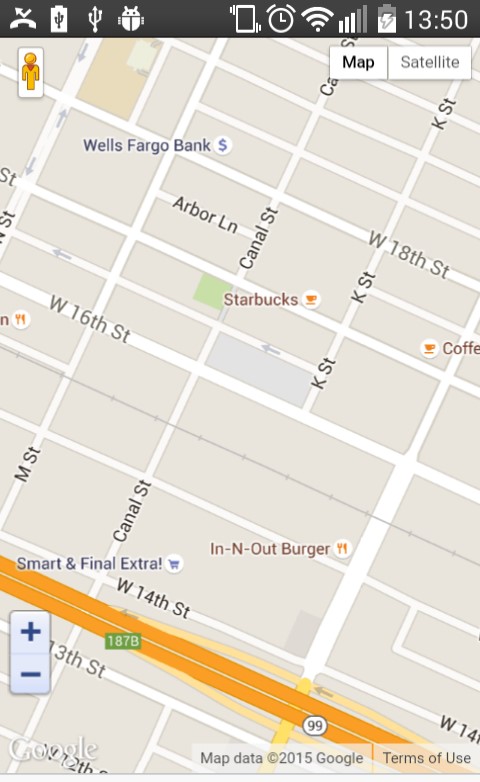
XI. Finally we deploy the application and it looks like the image bellow.
