Get “non XML” file on request based on a file name and send it via HTTP POST with OSB 12c
Requirement is fairly simple, there is a need to transfer a “non XML” file (in this specific case .pdf document) based on the file name which is sent in the Request message and transfer the file to another external system using HTTP POST.
So the pdf document we need to get is located on the FTP server and needs to be send to the URL provided by the external system via HTTP POST. Which for example with cURL looks really simple:
curl.exe -u external:extP@ss -k –data-binary @DokumentA.pdf -H “Content-Type: application/pdf” https://dev.externalsystem.com/doc/folder
So lets start right away and see how can you accomplish this in Service Bus 12c. We have some prerequisites for which I will not go in great details, just to have it as a reminder:
- As we are going to use the FTP for getting the file from the server we need the FTP Adapter setup on our weblogic. Then remember to put some pdf files in the designated folder on FTP location and you will need that correct folder path to the files later on.
- For proxy service and a request messages you can have any type of transfer (HTTP, jms, jca, local…) as long as the file name is coming in that request message which will trigger the file transfer. I will be using a simple WSDL based proxy service.
Implementation of the requirement can be split in two parts, first part is to pick up the file based on the file name, and second part to post the file on the designated URL.
Part one
For the first part we need to create a FTP Adapter in External Services lane in jDeveloper. So do a right click in the External Services lane and from the menu choose Insert Adapters -> FTP and wizard window will appear which we will now setup.
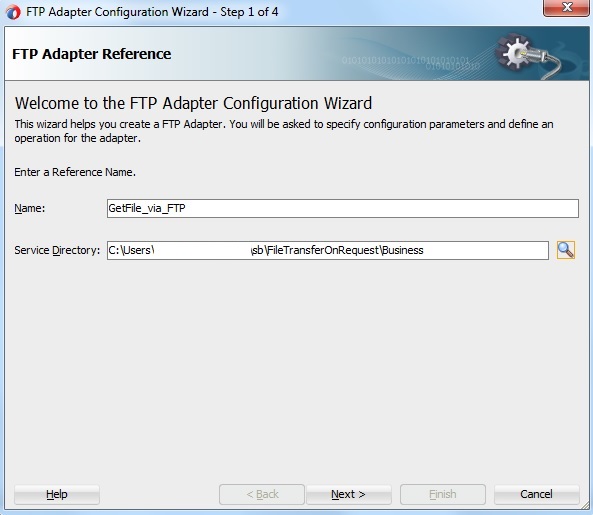
Step 1. Enter a reference name for the FTP Adapter and a folder. Click Next
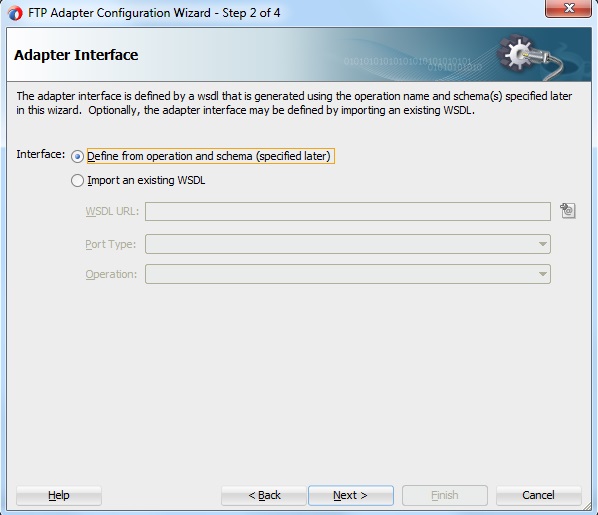
Step 2. Select the Interface option: “Define from operation and schema (specified later)”. Click Next
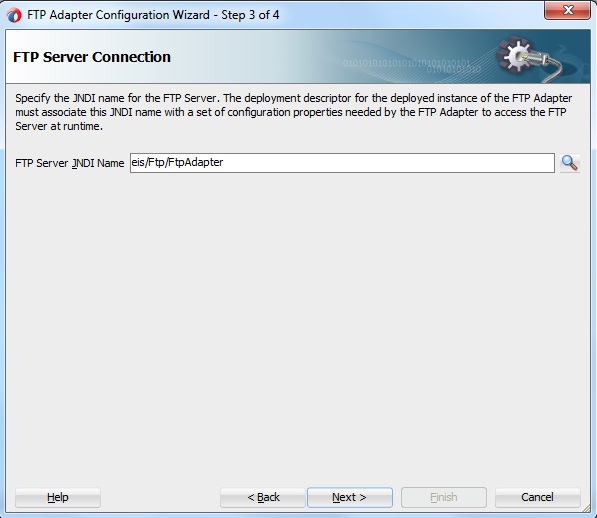
Step 3. Enter your FTP Server JNDI Name. Click Next
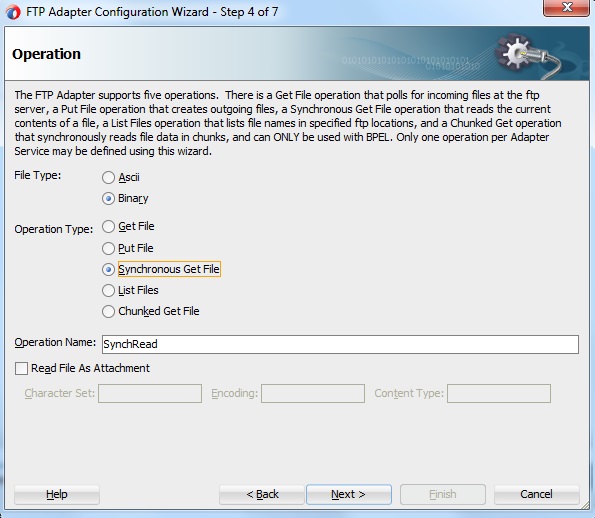
Step 4. Here we need to select File Type as “Binary” and Operation Type as “Synchronous Get File”. Why Synchronous Get? Synchronous Get File allows us to pick up the file based on the files name without the Polling option. “Get File” operation type is a Polling option which we do not need in this case. Operation type can be as default or you can enter your custom one. Do not mark the check box for “Read File as Attachment” leave it unchecked. Click Next
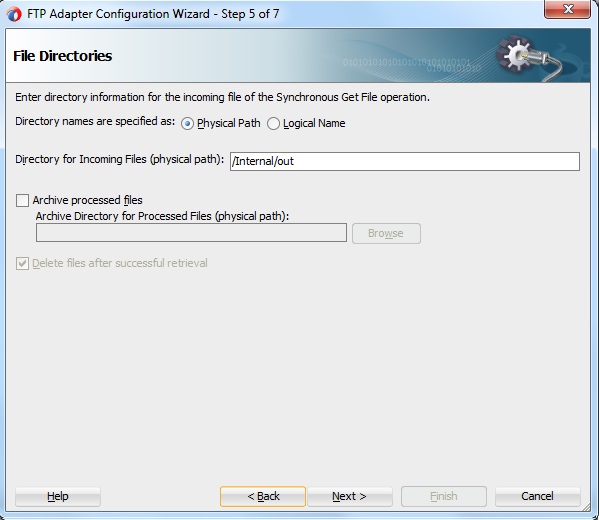
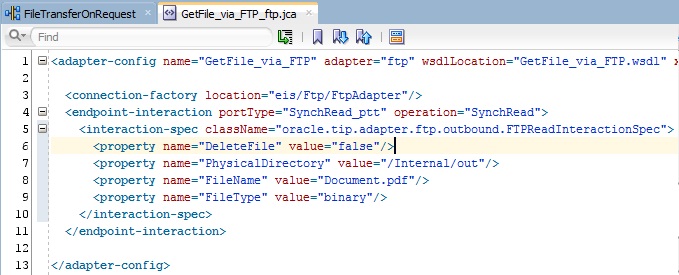
Step 5. Here just enter your physical folder path from the FTP location where the files will be located. Option: “Delete files after successful retrieval” is option and based on your requirements. In this case I need to uncheck this option, which I will show later how to do manually in the .jca file of the FTP Adapter.
Click Next
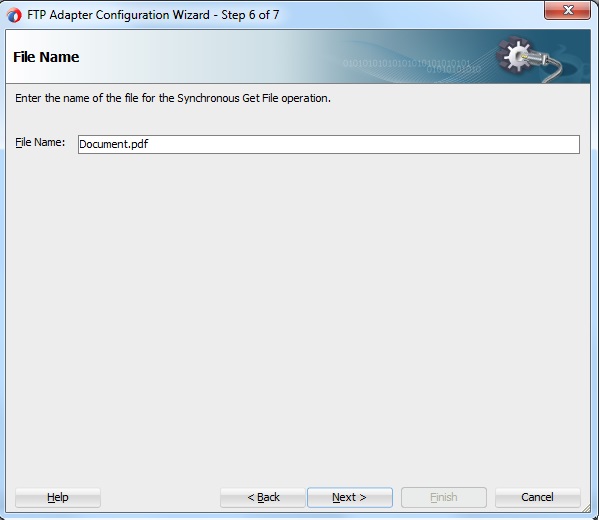
Step 6. Just enter custom file name as you wish. Click Next
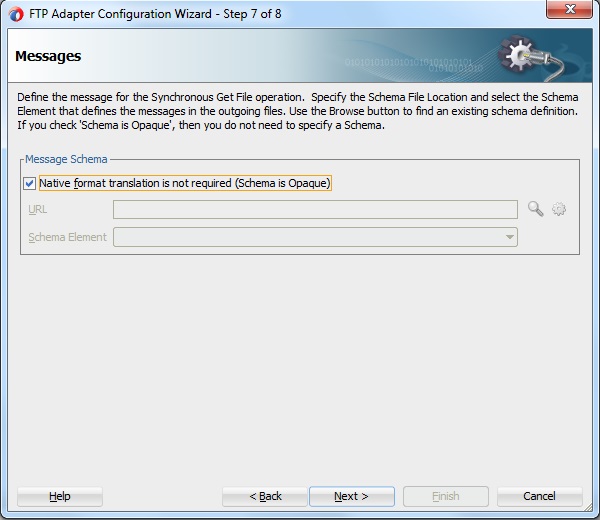
Step 7. For Message Schema we will select “Native format translation is not required (Schema is Opaque)” The opaque element in the opaque ‘schema’ should be base64 encoded data. Not just any string or XML block. And in our case we have a binary data transfer which will be encoded with the base64 base encoding. Click Next.
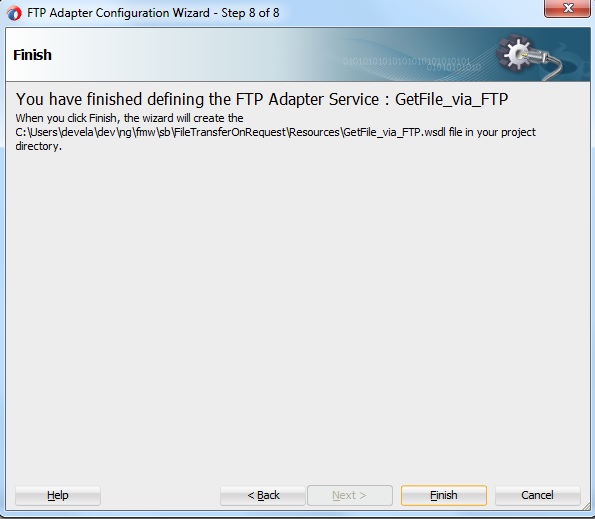
Step 8. And as a last step just click Finish and connect your new business service with the pipeline.
Last little tweak as I mention in the Step 5 above is to manually set the DeleteFile property of the FTP .jca is to set it to “false”.
Part two
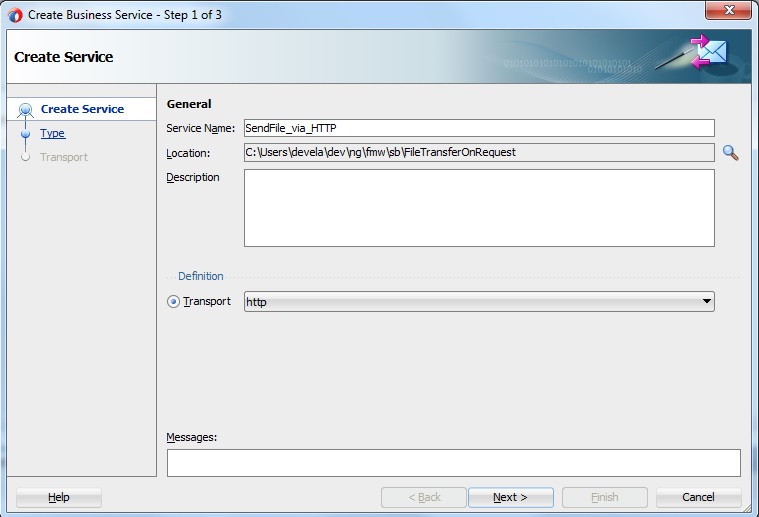
Now for the Part two we need to create another HTTP transfer business service. Right click on the External references lane and chose: Insert Transports -> HTTP.
Step 1. Enter your service name and click Next.
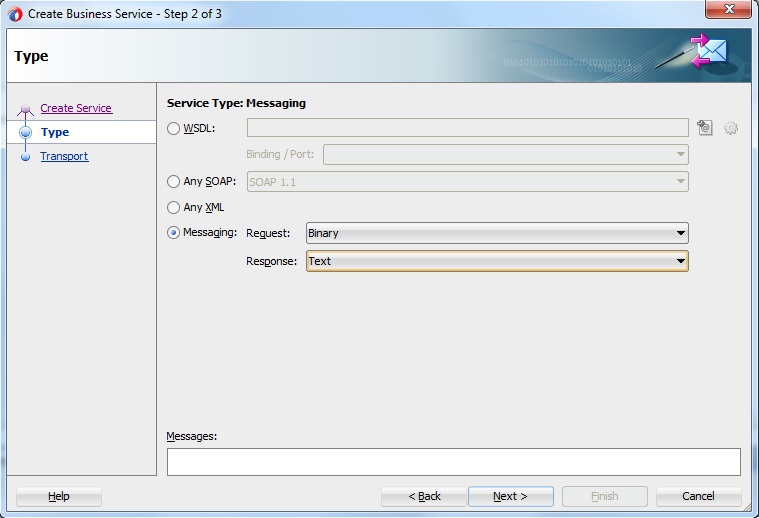
Step 2. Now select options Messaging with Request as “Binary” and Response as “Text”. In my case I’m expecting Text as a response after posting the file.
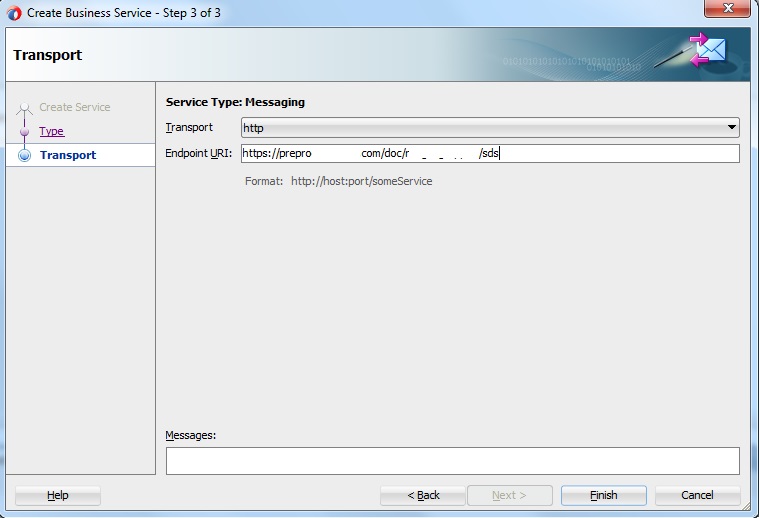
Step 3. Here just double check the Endpoint URI of your invoking service. Click Finish and connect this business service to the pipeline also.
Now you should have something like this:
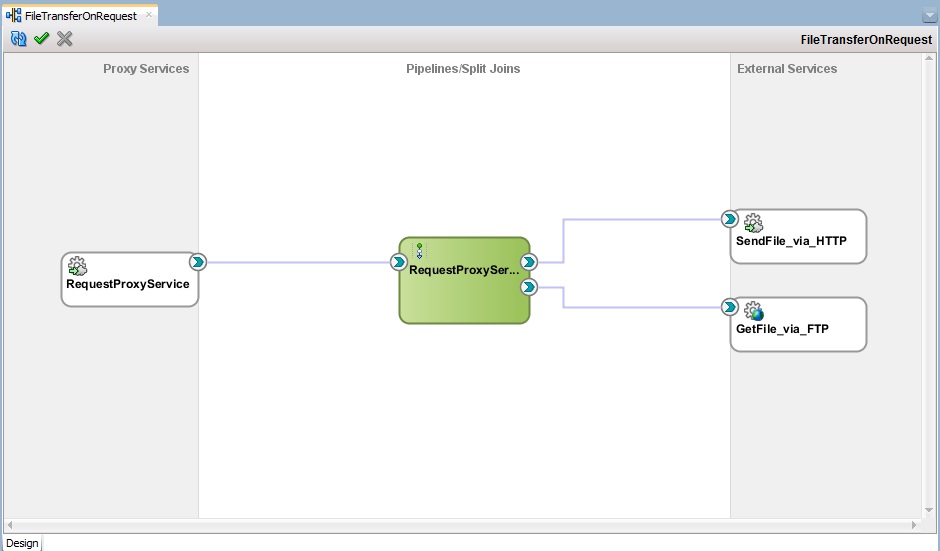
Service Callout in Pipeline
Next here is to implement a Service Callouts in the pipeline to connect everything together for a successful .pdf document transfer. For the first Service Call and retrieving the pdf file most important is to properly set up the Transport Headers so the file is picked up by the name from the request and not the default one we already have set as “Document.pdf”. And this is all we need for successfully getting the file.
![]()
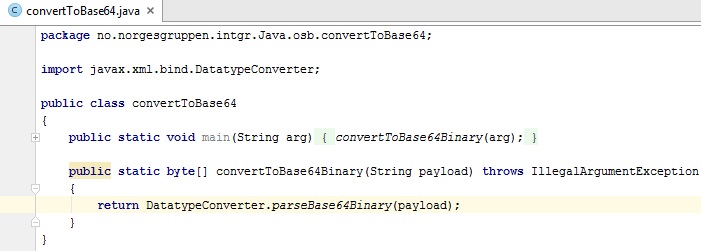
Next step is to send the file we have retrieved from the FTP server and this part will be some more work. As you remember our file is now binary data set encoded with base64 and we need to decode it before sending it to the HTTP web service. That means that we need to write a Java method for decoding the base64 data payload because there is no built-in function for this in Service Bus. After which we need to import the .jar file and add the Java CallOut. This is the method you can use for the decoding.
Now add the Java CallOut activity and import the .jar file into the Service Call.
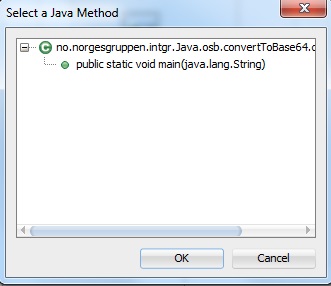
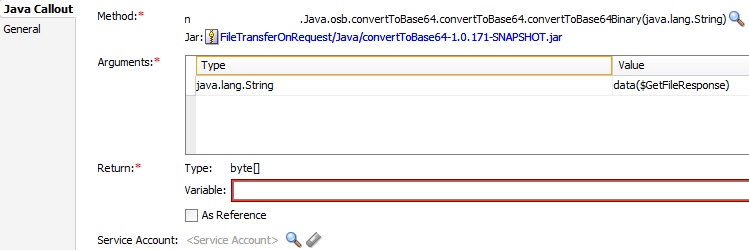
As I’m using jDeveloper version 12.1.3.0.0 I had issues with displaying the method with byte[] return value type. I haven’t checked if this is fixed in the next versions and patches. But here you will need to manually set this in the pipeline code if you have the same issue that I faced. For now just use and select the main method so we can finish with the import of .jar.
And you will probably get something similar like this:
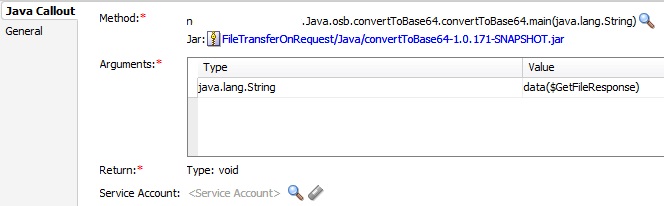
As you can see the Return Type is void, but we need it to be byte[] as it is in our conversion method. Now we will do this manually in the pipeline code. Open the pipeline code in the text editor and in the code find the Java CallOut part and the “method” element which should look like this:
<con1:method>public static void main(java.lang.String)</con1:method>
You will need to replace it with this:
<con1:method>public static [B convertToBase64Binary(java.lang.String)</con1:method>
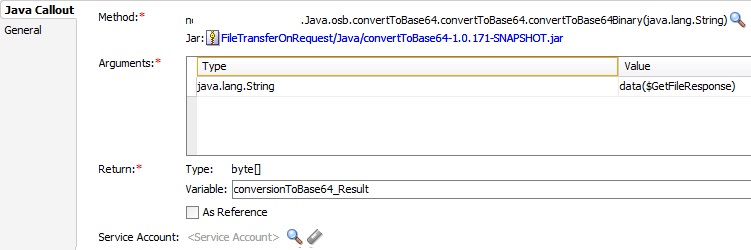
Save the pipeline code in the text editor and close it. Go back to the jDeveloper in which the Java CallOut should be refreshed with the changes we made and it should now look like this:
Return Type should now be byte[] as we want it to be and just add some custom name for the variable in which the return payload of the method will be. And your Java CallOut should be finished and ready:
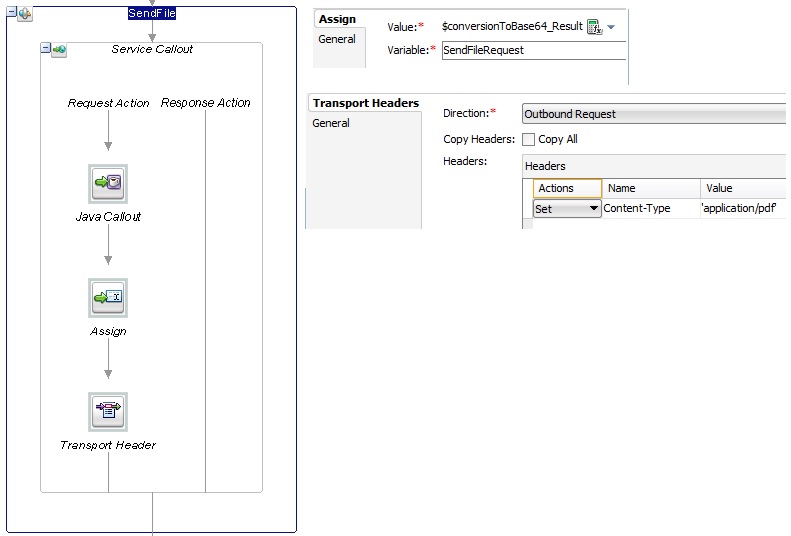
And this is the entire Service Callout with Assign and Transport Headers activities.
Final step - Test & Result
As a final step we will test our Service Bus project and try to transfer the PDF file and you are ready to go. Here is how it looks from the Pipeline in the Service Bus console.
![]()