Java Virtual Machine Diagnostics (JVMD) Installation and Configuration on OEM Cloud Control 12C
Installing JMVD
The aim of this guide is to show you how to activate the JVMD on OEM Cloud Control 12C. According to [1] these are the main steps to install JVMD
-
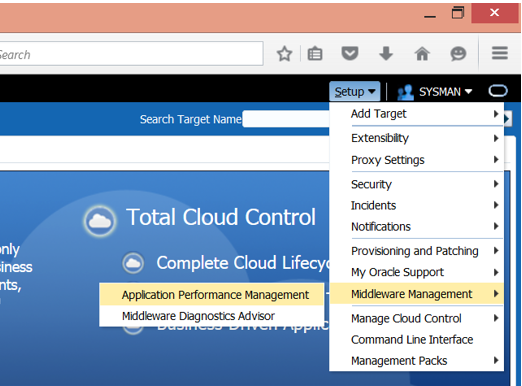
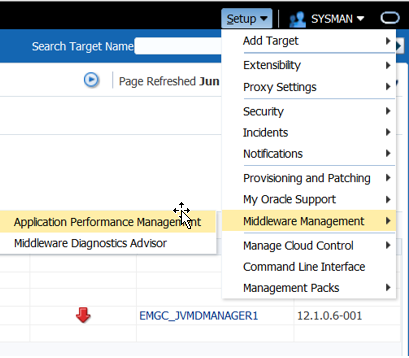
Select the option Setup>Middleware Management>Application Performance Management
-
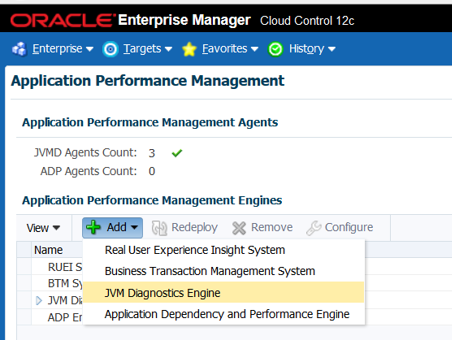
Select this option Add>JVM Diagnostics Engine
-
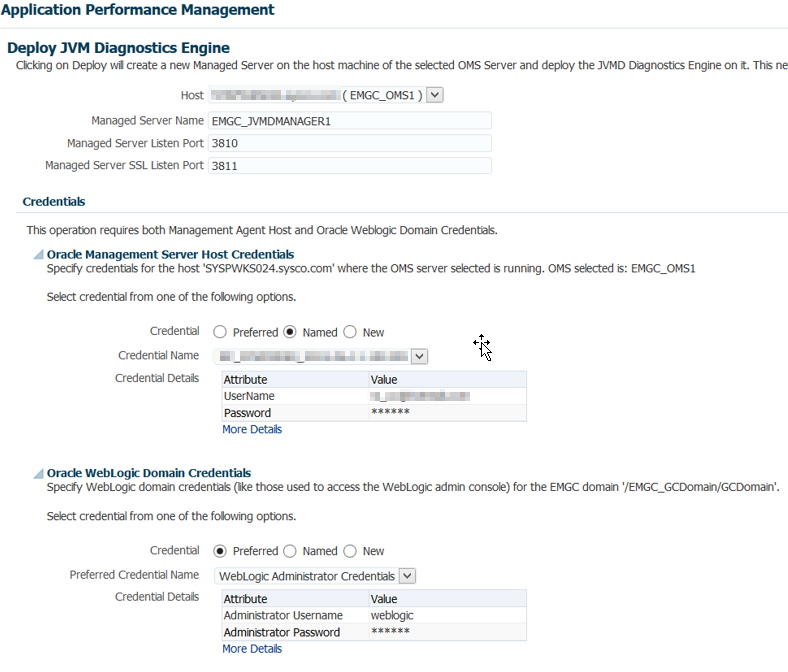
In this step this information is filled:
Information about JVM engine, this information will be used to create a new Weblogic managed server where the JVM engine will be deployed. This new managed server will be part of the GC Domain.
• Host • Managed Server Name • Managed Server Listen Port • Managed Server SSL Listen Port
Host credentials, credentials for the host where Oracle Management Services (OMS) is running
Weblogic domain credentials, to specify the credentials of the GC Domain’s weblogic user.
-
Click on Deploy

-
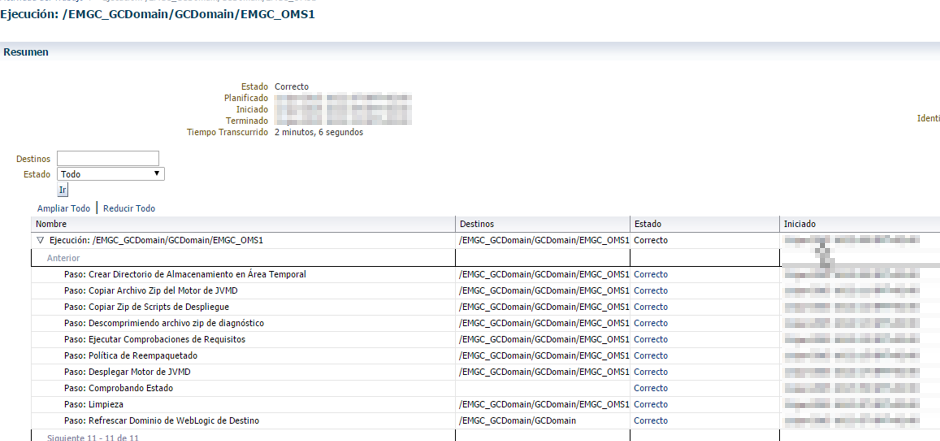
The progress of the deployment is shown in this screen.
Review the JVMD configuration
After installing the JVMD we can review the configuration using the steps described in [2].
-
Select the option Setup>Middleware Management>Application Performance Management
-
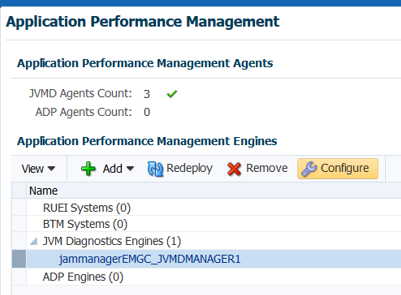
Select the JVM Diagnostic Engine called “jammanagerEMGC_JVMDMANAGER1” and click on Configure.
-
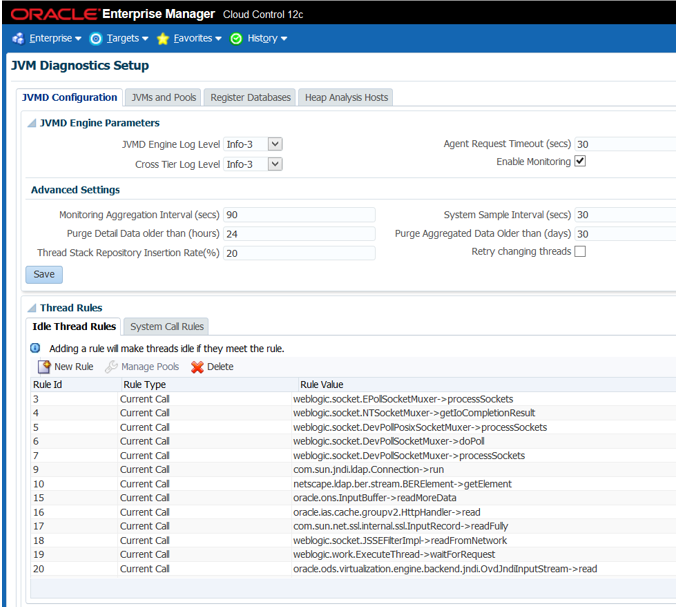
We can select the different tabs to review the JVMD configuration, the JVMD Pools, etc. as can be seen in this picture.

Configuring Diagnostic Agents
With this steps the diagnostic agent will be configured on the weblogic servers within the GCDomain.
-
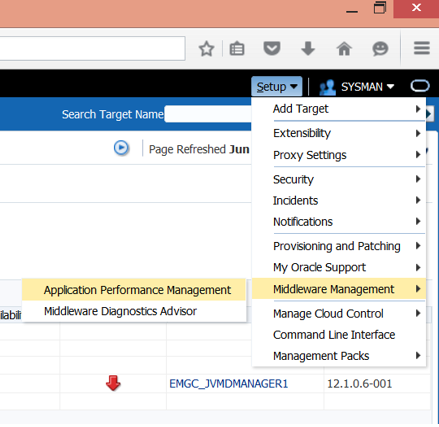
Select the option Setup>Middleware Management>Application Performance Management
-
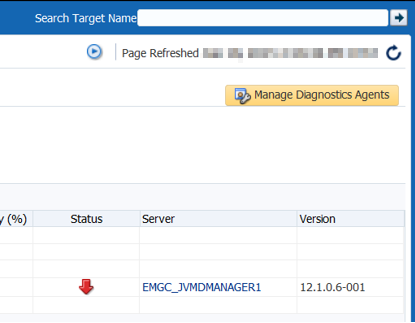
Click on Manage Diagnostic Agents.
-
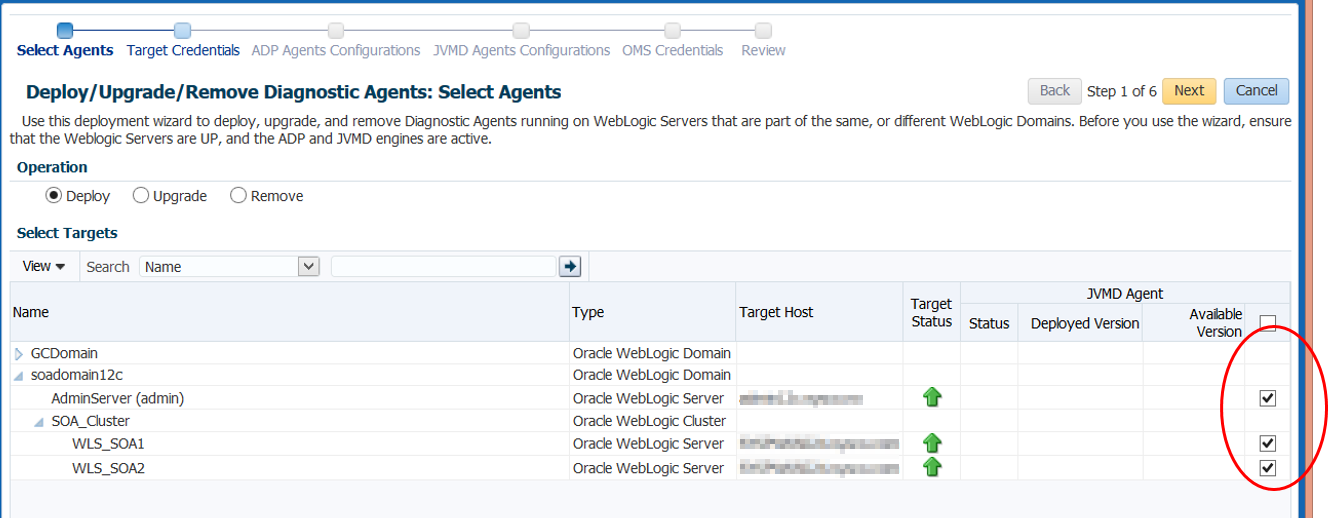
In this case there are two domains. The first one is the GCDomain, which was configured automatically and the second one is the soadomain12c that was configured manually after installing the OEM Cloud Control 12C. For this example the soadomain12c will be used. Whit this in mind, mark these checkboxes and click on Next.
-
In this page the system requests the host and domain credentials. As my OEM installation was made on the same host (it is not a good idea, but it is only a demonstration) where my SOA domain resides, I can reuse the host credentials. However, in the case of the domain, I have to enter their credentials.
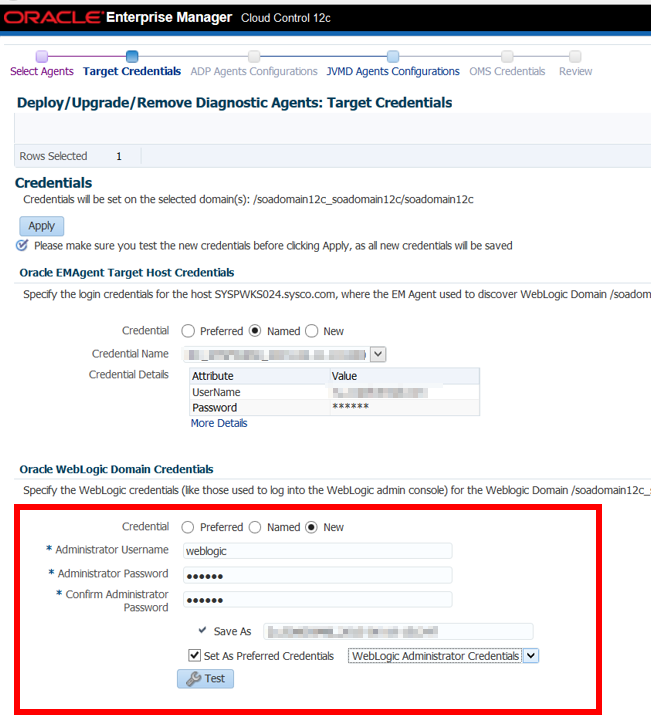
In the previous page, the check box “Set As Preferred Credentials” is marked in order to use these weblogic credential for future tasks on the SOA domain.
-
Click on Apply.
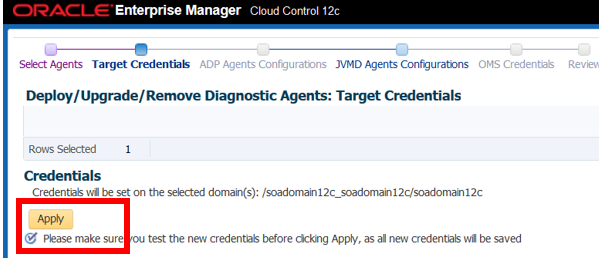
After that, the page is updated. Click on Next.

-
Keep the default values and click on Apply then click on Next.
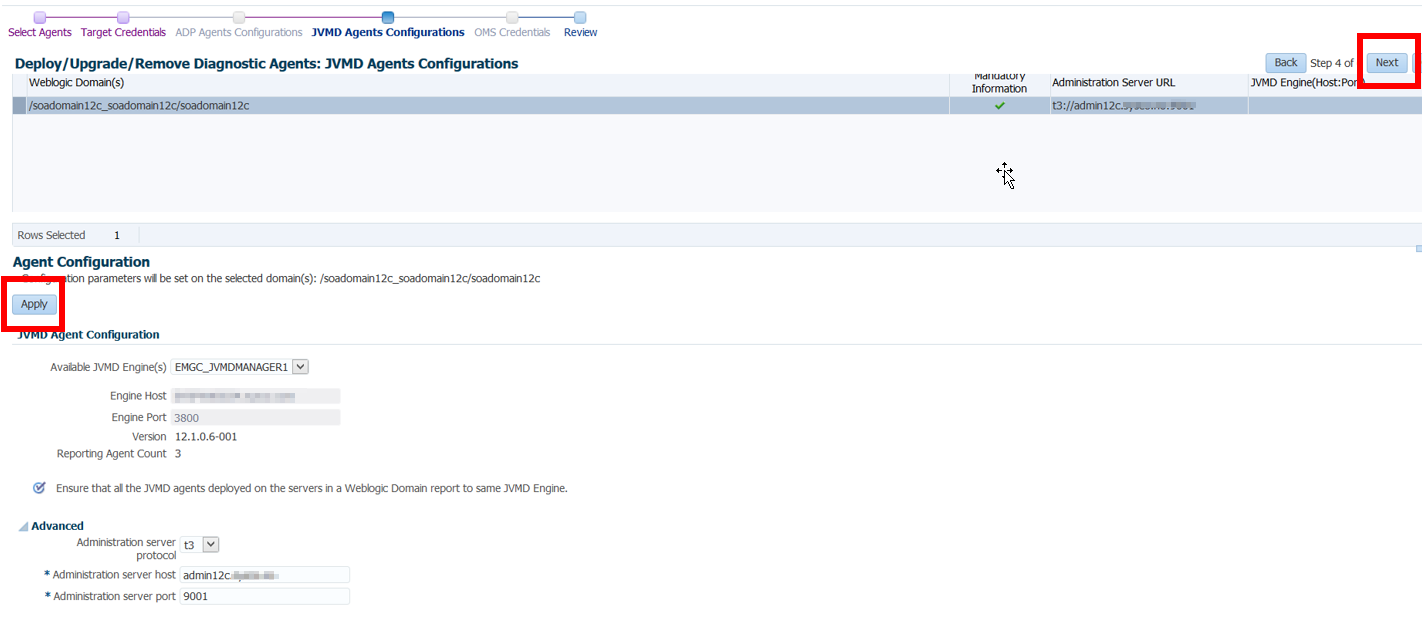
-
Click on Deploy.

-
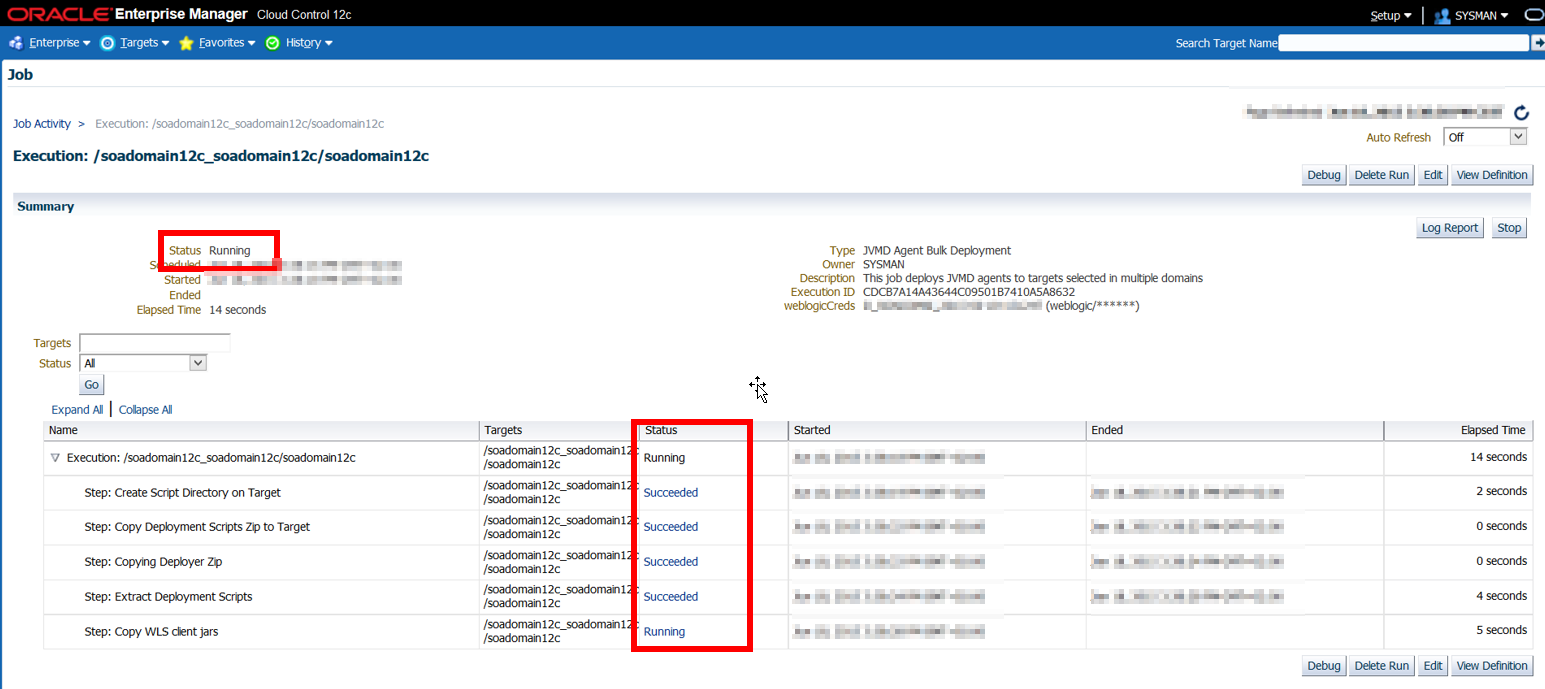
The progress of the operation can be monitored.
When the status is updated to “Succeeded” the deployment is complete.
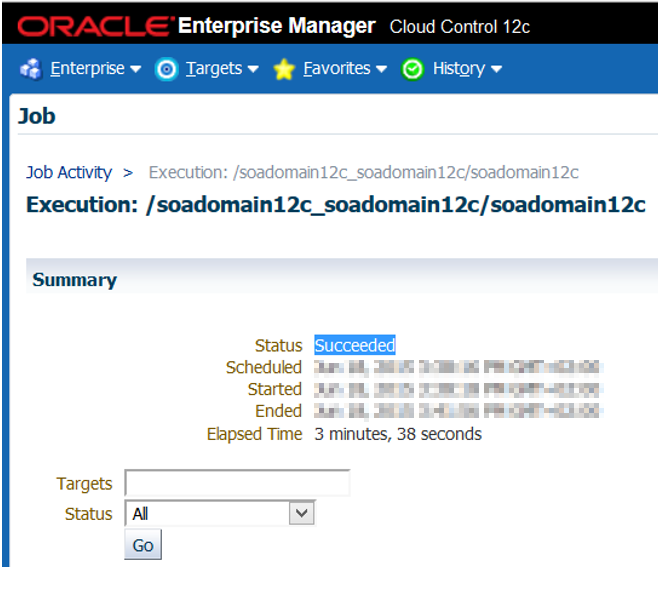
Now we can see JVM pools in the target navigation panel.

References list
[1] Oracle (2015) Installing JVM Diagnostics [Online document] Available from: http://docs.oracle.com/cd/E24628_01/install.121/e22624/jvmd_installation.htm#EMBSC213 (Accessed: 17 May 2016)
[2] Oracle (2015) Using JVM Diagnostics [Online document] Available from: https://docs.oracle.com/cd/E28271_01/install.1111/e24215/ad4j_using.htm (Accessed: 17 May 2016)