Cook a SOA/BPM Development Environment with Chef in 8 minutes!
After have installed Oracle SOA Suite over and over again, you start to finding out that these are boilerplate tasks and do not generate much value, because this are only the initial step to implement solutions with SOA and BPM.
In this post I will show you how to automate these steps using Chef.
Chef is a software provisioning tool that enable transform infrastructure as code.
The goal is prepare a development environment with Oracle BPM Suite on Windows including the following components installed and configured:
- Oracle WebLogic Server 10.3.6
- Oracle SOA Suite 11.1.1.7 (SOA, BPM and BAM)
- a BPM Domain with one server with SOA and BPM (Admin Server) and other server with BAM (optional)
Chef
Chef, as its name says, is a tool that enable us to create and use “Cookbooks” which includes “Recipes”. Each “Recipe” includes a set of procedures called “Resources”. This “Resources” are the more basic elements in Chef and represent a combination of a Component and a desired Status. For example:
Literal: We require the Apache HTTP Service started.
With Chef:
    service "apache" do
      action :start
    end
Then, as a Chef, we can combine several recipes to cook our infrastructure. This list of recipes and its order are called “Run Lists”.
Chef has two approaches to execute recipes: “Client/Server” and “Chef Solo”. Opscode offer a cloud service to host our Chef Server or we can install our own Chef Server. The Chef Client has two possible ways to work, as a Server client, or as a standalone tool called “Chef Solo”. I recommend the Chef Solo approach to start learning Chef.
As Chef there are some really good tools, like Puppet and Ansible, that can help you with provisioning tasks.
Requisites:
- JDK 7 installed.
- Oracle XE installed
- SOA database schemas created with RCU
- Chef Client installed
Steps
I have created the recipes to install Oracle WebLogic Server and Oracle SOA Suite, and other recipe to create a domain.
Chef directory structure
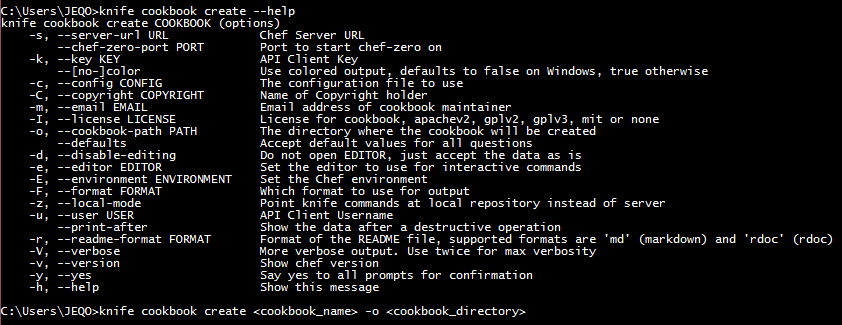
After install Chef Client, we can use the Knife tool to create a cookbook:
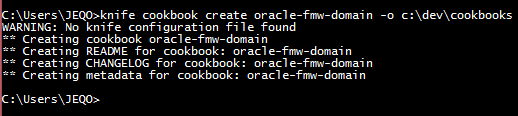
For example, in this case we create a Cookbook for Fusion Middleware domains, where we will save our recipes to create or modify domains:
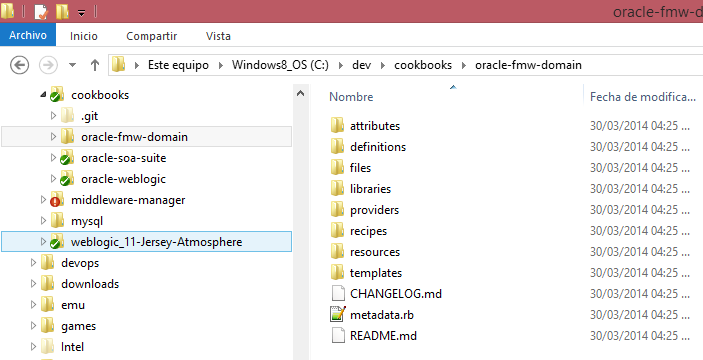
The main directories are:
- recipes: where our recipes are
- attributes: files with properties used by recipes
- templates: able to be combined with attributes to create new files.
Cookbooks
In this post, I have created 3 cookbooks:
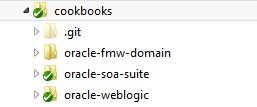
- oracle-weblogic: includes the recipes to install and configure WLS.
- oracle-soa-suite: the same for SOA Suite.
- oracle-fmw-domain: recipes to create and modify Fusion Middleware’s domains.
Recipes
Each Cookbook could have several recipes. For example, in WebLogic’s cookbook I can create a recipe to install 10g version, another recipe to upgrade to 11g, anothe to install some patch and so on.
| Cookbook | Recipe | Name | Description |
|---|---|---|---|
| oracle-weblogic | install-wls-10.3.6 | oracle-weblogic::install-wls-10.3.6 | Installs WLS |
| oracle-soa-suite | install-soa-11.1.1.7 | oracle-soa-suite::install-soa-11.1.1.7 | Installs Oracle SOA Suite |
| oracle-fmw-domain | create-domain-soabpm-dev | oracle-fmw-domain::create-domain-soabpm-dev |
Let’s go to check how the recipe’s code is to run the “Run List” and create our development environment.
Resources
Resource: Template
As any template, this resource is used to create new files based on recipe attributes. For exaple: To install WLS in silent-mode, we need to create a XML file with information about directories, JDK path, etc.
A template like this:
    <?xml version="1.0" encoding="UTF-8"?>
    <bea-installer>
      <input-fields>
        <data-value name="BEAHOME" value="<%= @mw_home %>" />
        <data-value name="WLS_INSTALL_DIR" value="<%= @wls_home %>" />
        <data-value name="COMPONENT_PATHS" value="WebLogic Server/Core Application Server|WebLogic Server/Administration Console|WebLogic Server/Configuration Wizard and Upgrade Framework|WebLogic Server/Web 2.0 HTTP Pub-Sub Server|WebLogic Server/WebLogic SCA|WebLogic Server/WebLogic JDBC Drivers|WebLogic Server/Third Party JDBC Drivers|WebLogic Server/WebLogic Server Clients|WebLogic Server/WebLogic Web Server Plugins|WebLogic Server/UDDI and Xquery Support|WebLogic Server/Evaluation Database|WebLogic Server/Server Examples|Oracle Coherence/Coherence Product Files" />
      </input-fields>
    </bea-installer>
And each <%= @variable_name %> will be replaced with recipe variables:
    template weblogic_response do
          source "weblogic_response.erb"
          rights :full_control, user
          variables({
               :middleware_home => node["wls_installation"]["middleware_home"],
               :weblogic_home => node["wls_installation"]["weblogic_home"],
               :java_home => node["wls_installation"]["java_home"]
          })
    end
And these values come from attributes file:
    default["wls_installation"]["middleware_home"] = "C:/u01/oracle/fmw/soabpm/11.1.1.7"
    default["wls_installation"]["weblogic_home"] = node["wls_installation"]["middleware_home"] + "/wlserver_10.3"
    default["wls_installation"]["java_home"] = "C:/oracle/java/jdk1.7.0_51"
Resource: Execute
Another important resource is Execute which let you execute commands on OS. For example: the commands to start the installation, etc.
    # Install script
    run_command = node["soa_installation"]["soa_tmp_dir"] + "/Disk1/install/win64/setup.exe -jreLoc " + node["soa_installation"]["java_home"] + " -silent -response " + oracle_soa_response

    # Run installer
    execute run_command do
      action :run
      not_if do
           FileTest.directory?(node["soa_installation"]["oracle_soa_home"])
      end
    end
Here, we define the command that trigger the SOA Suite installation called “run_command”, only if the SOA directory doesn’t exist.
Execution
To start the installation, first we must have Chef Client installed and then we must check the attributes to align these with our requirements.
To do this, we should enter WebLogic cookbook and then enter attributes directory:
    # User who installs the software
    default["wls_installation"]["user"] = "JEQO"
    # Where weblogic would be installed
    default["wls_installation"]["directories"] = [
      "C:/u01",
      "C:/u01/oracle",
      "C:/u01/oracle/fmw",
      "C:/u01/oracle/fmw/soabpm",
      "C:/u01/oracle/fmw/soabpm/11.1.1.7",
      "C:/u01/oracle/fmw/soabpm/11.1.1.7/tmp"
    ]
    # Oracle Homes
    default["wls_installation"]["middleware_home"] = "C:/u01/oracle/fmw/soabpm/11.1.1.7"
    default["wls_installation"]["weblogic_home"] = node["wls_installation"]["middleware_home"] + "/wlserver_10.3"
    default["wls_installation"]["java_home"] = "C:/oracle/java/jdk1.7.0_51"
    # WebLogic installer http://download.oracle.com/otn/nt/middleware/11g/wls/1036/wls1036_generic.jar
    default["wls_installation"]["installer"] = "C:/oracle/fmw/installers/wls/wls1036_generic.jar"
In the same manner, we can enter SOA Cookbook attributes directory and check the files:
    # Oracle Homes
    default["soa_installation"]["middleware_home"] = "C:/u01/oracle/fmw/soabpm/11.1.1.7"
    default["soa_installation"]["oracle_soa_home"] = "C:/u01/oracle/fmw/soabpm/11.1.1.7/oracle_soa"
    default["soa_installation"]["java_home"] = "C:/oracle/java/jdk1.7.0_51"
    default["soa_installation"]["soa_tmp_dir"] = "C:/u01/oracle/fmw/soabpm/11.1.1.7/tmp/soa"
    default["soa_installation"]["directories"] = [
      "C:/u01",
      "C:/u01/oracle",
      "C:/u01/oracle/fmw",
      "C:/u01/oracle/fmw/soabpm",
      "C:/u01/oracle/fmw/soabpm/11.1.1.7",
      "C:/u01/oracle/fmw/soabpm/11.1.1.7/tmp",
      "C:/u01/oracle/fmw/soabpm/11.1.1.7/tmp/soa"
    ]
    # Installers. http://www.oracle.com/technetwork/middleware/bpm/downloads/index.html
    default["soa_installation"]["installer_zips"] = [
      "C:/oracle/fmw/installers/soa/ofm_soa_generic_11.1.1.7.0_disk1_1of2.zip",
      "C:/oracle/fmw/installers/soa/ofm_soa_generic_11.1.1.7.0_disk1_2of2.zip"
    ]
    # User who installs the software
    default["soa_installation"]["user"] = "JEQO"
To define the domain attributes, enter FMW Domains/attributes and check the files:
    # Oracle Homes
    default["fmw_domain"]["middleware_home"] = "C:/u01/oracle/fmw/soabpm/11.1.1.7"
    default["fmw_domain"]["oracle_common_home"] = "C:/u01/oracle/fmw/soabpm/11.1.1.7/oracle_common"
    default["fmw_domain"]["oracle_soa_home"] = "C:/u01/oracle/fmw/soabpm/11.1.1.7/oracle_soa"
    default["fmw_domain"]["weblogic_home"] = "C:/u01/oracle/fmw/soabpm/11.1.1.7/wlserver_10.3"
    default["fmw_domain"]["java_home"] = "C:/oracle/java/jdk1.7.0_51"
    # BPM server
    default["fmw_domain"]["bpm_server_name"] = "bpm_server01"
    default["fmw_domain"]["bpm_server_port"] = 7001
    # Domain info
    default["fmw_domain"]["domain_name"] = "dev_soabpm_domain"
    default["fmw_domain"]["domain_directory"] = "C:/u01/oracle/work/soabpm/11.1.1.7/domains"
    default["fmw_domain"]["app_directory"] = "C:/u01/oracle/work/soabpm/11.1.1.7/apps"
    # Metadata schemas
    default["fmw_domain"]["db_host"] = "localhost"
    default["fmw_domain"]["db_port"] = 1521
    default["fmw_domain"]["db_service"] = "xe"
    default["fmw_domain"]["db_schema_prefix"] = "DEVBPM"
    # BAM?
    default["fmw_domain"]["bam_enabled"] = true
    # User
    default["fmw_domain"]["user"] = "JEQO"
At the end, we should validate Chef executables are included in the PATH environment variable to execute the script “install_soabpm.cmd” that contains the following commands:
chef-solo -c solo.rb -j node_soabpm.json
Where solo.rb contains Chef basic parameters and the JSON file contains the “run list” to execute recipes:
    {
      "run_list": [
           "recipe[oracle-weblogic::install-wls-10.3.6]",
           "recipe[oracle-soa-suite::install-soa-11.1.1.7]",
           "recipe[oracle-fmw-domain::create-domain-soabpm-dev]"
      ]
    }
To start the installation we should open a command-line as Adminsitrator and run the “install_soabpm.cmd”:

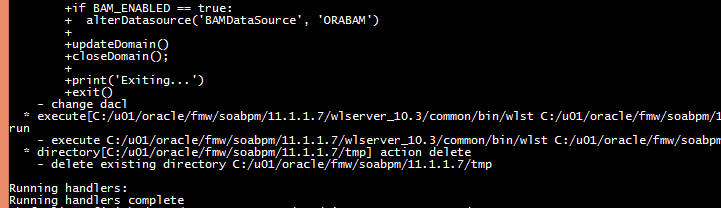

After about 8 minutes you can start your BPM server :-)
Conclusions
With Chef or Puppet tools and Vagrant (who provides VMs) is possible to automate almost all the installation and configuration tasks required to prepare environments dynamically, transforming knowledge into reusable code and this code could be improved over time.
Resources
The source code is shared on GitHub The best resources I found to learn Chef