Installing on-premise Kubernetes cluster using kubeadm
Motivation and target audience
This blog post is geared towards developers and administrators who want to setup an on-premise Kubernetes cluster. This post will guide you towards the basics of setting up a multi-node kubernetes cluster on linux servers and will address some of the key concerns during the setup.
Kubernetes is a huge area in itself and this post does not intend to cover all the nitty-gritty setup details. Instead, this blog post aims to provide a convenient starting point.
Introduction
Kubernetes (K8s) is a container orchestration technology that focuses on easing the efforts required to build, deploy, scale and manage containerized applications. It also provides means to manage complicated and dynamic life cycle of containerized applications. It was first developed at Google, but later on open sourced as a seed technology to Cloud Native Computing Foundation (CNCF).
From Kubernetes website:
Kubernetes (k8s) is an open-source system for automating deployment, scaling, and management of containerized applications. It groups containers that make up an application into logical units for easy management and discovery. Kubernetes builds upon 15 years of experience of running production workloads at Google, combined with best-of-breed ideas and practices from the community.
Some of the distinguished kubernetes features are:
- Service discovery and load balancing.
- Automatic binpacking.
- Storage orchestration.
- Self-healing.
- Automated rollouts and rollbacks.
- Secret and configuration management.
- Batch execution.
- Horizontal scaling.
You can read more about Kubernetes features here. If you are interested in some case studies you can find them here. In the next section we will start with installing the kubernetes cluster on linux.
Content:
- Prerequisites.
- Hardware and OS specifications
- Hostname configurations
- Configure host files
- Verify MAC and product_uuid
- Disable SELinux and Swap
- Install software and other dependencies.
- Install docker
- Install Kubernetes components
- Configure kubernetes master and initialize cluster.
- Initialize master
- Create kube configuration in home directory
- Install flannel network
- Configure correct firewall rules
- Add nodes to the cluster.
- Deploying services and Testing.
- Create deployment
- Expose deployment as service
- Testing service
- Accessing kubernetes cluster from local machine.
- Install kubectl on local machine
- Proxy connections to master using
kubectl proxy - Connect to master using admin.conf
- Where to go from here.
- Sources and References.
1. Prerequisites
In this example we will set up a kubernetes cluster with one master and 2 nodes.
Hardware and OS specifications.
We will use 3 CentOS 7 servers with minimum 2 CPU and 2 GB RAM. You should have root privileges on the servers to install the required software packages.
Note : The hardware mentioned is to setup basic minimum configuration for kubernetes. Kubernetes comes with lots of bells and whistles and if you are installing all bells and whistles, please refer to this documentation for more details. For this example we have provisioned 3 server with below IPs
- 192.168.37.48 - This will act as our Master
- 192.168.37.49 - This will be first node of our cluster
- 192.168.37.50 - This will be the second node of the cluster
It is important to mention here that kubernetes works in accordance with master slave architecture. The pods will never be scheduled on the master, instead master will act as a coordinator to manage different kubernetes services, manage traffic between the pods and manage workload scheduling on the nodes.
Hostname configurations
Login to each of the server via terminal and change the hostname by following below 2 steps. For example on server 192.168.37.48 we have setup the corresponding host name as kubernetes1.oslo.sysco.no
- run
hostnamectl set-hostname kubernetes1.oslo.sysco.no - update host name in the file /etc/hostname to
kubernetes1.oslo.sysco.no
Follow same steps for other two servers as well.
Configure host files
In order for each of our hosts to communicate with others hosts by hostname, we should modify the host file configurations. We will add the below content to /etc/host file on each server.
192.168.37.48 kubernetes1.oslo.sysco.no
192.168.37.49 kubernetes2.oslo.sysco.no
192.168.37.50 kubernetes3.oslo.sysco.no
Note : Its important that you replace above settings with your IP and server alias.
After applying above settings, you should be able to ping other servers from each host. For example, in our case, we can ping kubernetes2.oslo.sysco.no from the host kubernetes1.oslo.sysco.no
[root@kubernetes1 ~]# ping kubernetes2.oslo.sysco.no
PING kubernetes2.oslo.sysco.no (192.168.37.49) 56(84) bytes of data.
64 bytes from kubernetes2.oslo.sysco.no (192.168.37.49): icmp_seq=1 ttl=64 time=0.460 ms
64 bytes from kubernetes2.oslo.sysco.no (192.168.37.49): icmp_seq=2 ttl=64 time=0.229 ms
64 bytes from kubernetes2.oslo.sysco.no (192.168.37.49): icmp_seq=3 ttl=64 time=0.205 ms
64 bytes from kubernetes2.oslo.sysco.no (192.168.37.49): icmp_seq=4 ttl=64 time=0.199 ms
64 bytes from kubernetes2.oslo.sysco.no (192.168.37.49): icmp_seq=5 ttl=64 time=0.262 ms
--- kubernetes2.oslo.sysco.no ping statistics ---
5 packets transmitted, 5 received, 0% packet loss, time 4000ms
rtt min/avg/max/mdev = 0.199/0.271/0.460/0.097 ms
References:
Verify MAC and product_uuid
We need to verifiy that each host in the cluster has unique MAC and product_uuid. Kubernetes uses these values to uniquely identify the nodes in the cluster. If these values are not unique to each node, the installation process may fail.
- You can get the MAC address of the network interfaces using the command
ip linkorifconfig -a. For example the MAC address in our example are:kubernetes1.oslo.sysco.no-00:21:f6:8d:df:0bkubernetes2.oslo.sysco.no-00:21:f6:6a:26:77kubernetes3.oslo.sysco.no-00:21:f6:07:83:83
- The product_uuid can be checked by using the command
sudo cat /sys/class/dmi/id/product_uuid. For example the unique product ids in our example arekubernetes1.oslo.sysco.no-1234EEE2-0002-1000-9481-2C9B3620A4FFkubernetes2.oslo.sysco.no-1234EEE2-0002-1000-A7D1-ACE30E89E55Fkubernetes3.oslo.sysco.no-1234EEE2-0002-1000-0ED0-F6750310F8CC
Note : The product ids are changed in the above example. You should see the similar pattern for your setup. Its important that these value are unique for each node that forms a cluster.
References:
Configure OS level settings
So far we have verified our hardware, now its time to optimize some OS level settings in order to install kubernetes successfully.
- Enable br_netfilter Kernel Module: The br_netfilter module is required for kubernetes installation. This module is required to enable transparent masquerading and to facilitate VxLAN traffic for communication between Kubernetes pods across the cluster. Run the command below to enable the br_netfilter kernel module.
  modprobe br_netfilter
  echo '1' > /proc/sys/net/bridge/bridge-nf-call-iptables
If you are interested in why it is required, checkout this kubernetes issue.
- Disable SWAP : We need to disable swap on the servers in order for kubernetes installation to work properly. One of the important kubernetes component that we will install in the next few steps is
kubelet. In order for kubelet to work properly, the swap should be disabled. Disable the swap on each of the servers by using the following steps.- Login via ssh and run
swapoff -aon each host. - Edit the
/etc/fstabfile. Runvim /etc/fstaband comment the swap line UUID# /etc/fstab: static file system information. # # Use 'blkid' to print the universally unique identifier for a # device; this may be used with UUID= as a more robust way to name devices # that works even if disks are added and removed. See fstab(5). # # <file system> <mount point> <type> <options> <dump> <pass> # / was on /dev/nvme0n1p2 during installation UUID=47371a4c-3cdf-4ecc-b573-f09a029c74f4 / ext4 errors=remount-ro 0 1 # /boot/efi was on /dev/nvme0n1p1 during installation UUID=C176-4947 /boot/efi vfat umask=0077 0 1 # swap was on /dev/nvme0n1p3 during installation # COMMENT BELOW LINE # UUID=78aeec44-b1af-4720-9316-6af68385b23f none swap sw 0 0References
- why-disable-swap-on-kubernetes
- kubernetes-issue-7294
- Login via ssh and run
2. Install docker, kubernetes and other dependencies.
Now that we have successfully completed Hardware and OS level checks. Its time now to install the required software on our servers. Please go through the instructions below in order to complete software installation.
Install Docker
We will install docker-ce (community version) for this example. You can check for the various available versions of docker here. Also the steps to install docker on different operations systems are described in details here. You need to run the below scripts on each of the servers participating in the kubernetes cluster.
- Uninstall old version: Older versions of Docker were called docker or docker-engine. If these are installed, uninstall them, along with associated dependencies.
sudo yum remove docker \ docker-client \ docker-client-latest \ docker-common \ docker-latest \ docker-latest-logrotate \ docker-logrotate \ docker-selinux \ docker-engine-selinux \ docker-engine - Install docker-ce: Run the below commands in sequence to install the docker-ce
sudo yum install -y yum-utils device-mapper-persistent-data lvm2 sudo yum-config-manager --add-repo https://download.docker.com/linux/centos/docker-ce.repo sudo yum install docker-ce - Start docker daemon: This command will start the docker daemon if it is stopped.
sudo systemctl start docker
Install Kubernetes components
We will use kubeadm to bootstrap kubernetes cluster for our example. We will start with installing basic kubernetes components namely kubectl, kubeadm and kubelet. We need to run the below scripts on each of our servers.
- Add PPA repository for kubernetes: We will first add the ppa repository on each of our servers by running below command
cat <<EOF > /etc/yum.repos.d/kubernetes.repo [kubernetes] name=Kubernetes baseurl=https://packages.cloud.google.com/yum/repos/kubernetes-el7-x86_64 enabled=1 gpgcheck=1 repo_gpgcheck=1 gpgkey=https://packages.cloud.google.com/yum/doc/yum-key.gpg https://packages.cloud.google.com/yum/doc/rpm-package-key.gpg EOF - Install kubernetes components : Install the kubernetes binaries kubeadm, kubectl and kubelet using the yum command.
yum update -y yum install -y kubelet kubeadm kubectl - Restart servers : Reboot the servers by issuing the below command. This is required to apply and persist all the settings we have done so far.
reboot - Restart services: Login to each of the server and start docker and kubelet services by running the below commands.
systemctl start docker && systemctl enable docker systemctl start kubelet && systemctl enable kubelet -
Change cgroup drivers: It is important that docker-ce and kubernetes belong to the same cgroup. We can check the docker c-group by issuing the command
docker info | grep -i cgroup.kubernetes1 ~]# docker info | grep -i cgroup Cgroup Driver: cgroupfsAnd change the kubernetes cgroup to cgroupfs by issuing the command below
sed -i 's/cgroup-driver=systemd/cgroup-driver=cgroupfs/g' /etc/systemd/system/kubelet.service.d/10-kubeadm.confOnce these steps are complete, reload the systemd service and restart the kubelet service by using the command below. After these services restarted, we are ready to initialize our cluster.
systemctl daemon-reload
systemctl restart kubelet
3. Configure kubernetes master and initialize cluster.
Initialize master
Login to the server which you have decided to make the master. In our case we want kubernetes1.oslo.sysco.no to act as master so we do an ssh login and run the below command.
kubeadm init --apiserver-advertise-address=<server_ip> --pod-network-cidr=10.244.0.0/16
Replace the server_ip above with the IP of your master. The other supporting cluster services/nodes will connect to this IP while forming the cluster. For example in our case the it looks like
[root@kubernetes1 ~]# kubeadm init --apiserver-advertise-address=192.168.37.48 --pod-network-cidr=10.244.0.0/16
Once the command is successful, you will get a token which other nodes will use to join to the cluster. This will be displayed on your terminal and will look something like
kubeadm join 192.168.37.48:6443 --token 8hp10q.i4ln2b1ogof374aj --discovery-token-ca-cert-hash sha256:6a59c9b03fa971aef94d61a4f4c1a6b085308f88aab4db1a4affda8d65987867
You should carefully save this token. Your Kubernetes master should be initialized successfully by now.
Create kube configuration in home directory
To start using your cluster, you need to run the following as a regular user.
mkdir -p $HOME/.kube
sudo cp -i /etc/kubernetes/admin.conf $HOME/.kube/config
sudo chown $(id -u):$(id -g) $HOME/.kube/config
Install flannel network
You must deploy a pod network before anything will actually function properly. We will next, deploy the flannel network to the kubernetes cluster using the kubectl command. To check other networking options that can be used with kubernetes, please have a look here.
kubectl apply -f https://raw.githubusercontent.com/coreos/flannel/master/Documentation/kube-flannel.yml
Check if all the components are deployed properly
[root@kubernetes1 ~]# kubectl get nodes
NAME                        STATUS     ROLES    AGE     VERSION
kubernetes1.oslo.sysco.no   Ready      master   7m18s   v1.13.1
Also check if all required pods are running properly.
[root@kubernetes1 ~]# kubectl get pods --all-namespaces
NAMESPACE     NAME                                                READY   STATUS    RESTARTS   AGE
kube-system   coredns-86c58d9df4-kjmxn                            1/1     Running   0          63m
kube-system   coredns-86c58d9df4-lfx4p                            1/1     Running   0          63m
kube-system   etcd-kubernetes1.oslo.sysco.no                      1/1     Running   0          62m
kube-system   kube-apiserver-kubernetes1.oslo.sysco.no            1/1     Running   0          62m
kube-system   kube-controller-manager-kubernetes1.oslo.sysco.no   1/1     Running   0          63m
kube-system   kube-flannel-ds-amd64-mjn4j                         1/1     Running   0          55m
kube-system   kube-proxy-w8rfz                                    1/1     Running   0          55m
kube-system   kube-scheduler-kubernetes1.oslo.sysco.no            1/1     Running   0          62m
Configure correct firewall rules
In order to enable efficient communication between the nodes, we need to configure a few firewall rules on each node.
Run below commands to bridge IP traffic to iptables
cat <<EOF >  /etc/sysctl.d/k8s.conf
net.bridge.bridge-nf-call-ip6tables = 1
net.bridge.bridge-nf-call-iptables = 1
EOF
And apply these settings by running the below command
sysctl --system
You should see your latest k8s.conf being applied in the output
[root@kubernetes1 ~]# sysctl --system
* Applying /usr/lib/sysctl.d/00-system.conf ...
net.bridge.bridge-nf-call-ip6tables = 0
net.bridge.bridge-nf-call-iptables = 0
net.bridge.bridge-nf-call-arptables = 0
* Applying /usr/lib/sysctl.d/10-default-yama-scope.conf ...
* Applying /usr/lib/sysctl.d/50-default.conf ...
kernel.sysrq = 16
kernel.core_uses_pid = 1
net.ipv4.conf.default.rp_filter = 1
net.ipv4.conf.all.rp_filter = 1
net.ipv4.conf.default.accept_source_route = 0
net.ipv4.conf.all.accept_source_route = 0
net.ipv4.conf.default.promote_secondaries = 1
net.ipv4.conf.all.promote_secondaries = 1
fs.protected_hardlinks = 1
fs.protected_symlinks = 1
* Applying /etc/sysctl.d/99-sysctl.conf ...
* Applying /etc/sysctl.d/k8s.conf ...
net.bridge.bridge-nf-call-ip6tables = 1
net.bridge.bridge-nf-call-iptables = 1
* Applying /etc/sysctl.conf ...
Once these settings are applied, create rules to allow traffic on few ports that are used by kubernetes.
firewall-cmd --zone=public --add-port=6443/tcp --permanent
firewall-cmd --zone=public --add-port=80/tcp --permanent
firewall-cmd --zone=public --add-port=443/tcp --permanent
firewall-cmd --zone=public --add-port=18080/tcp --permanent
firewall-cmd --zone=public --add-port=10254/tcp --permanent
firewall-cmd --reload
Run above commands on each of the nodes. To get a better understanding of how networking works in kubernetes, please refer to the below links:
- cluster-networking
- kubernetes-networking-behind-the-scenes
- gcp-kubernets-networking-overview
- k8s-troubleshooting-systemd-issues
Alternate work around : Use the below steps only if you are setting up a demo cluster OR using the cluster in the controlled lab environment. Do not use below alternative in production settings.
In a controlled lab environment, you can skip the above steps by simply disabling the firewalls on each node. To do this login to each server and run below commands in sequence
systemctl stop firewalld
systemctl disable firewalld
You should see and output similar to below on each of the node
[root@kubernetes1 ~]# systemctl stop firewalld
[root@kubernetes1 ~]# systemctl disable firewalld
Removed symlink /etc/systemd/system/dbus-org.fedoraproject.FirewallD1.service.
Removed symlink /etc/systemd/system/basic.target.wants/firewalld.service.
Once again, please note that firewalls should never be disabled on production clusters.
4. Add nodes to the cluster
We have successfully initialized our cluster and in the previous section we have verified that the master node is up and running. It time now to add the nodes kubernetes2.oslo.sysco.no and kubernetes3.oslo.sysco.no to our cluster. In order to do that, ssh to each of the nodes and run the kubeadm join command that we copied earlier.
[root@kubernetes2 ~]#  kubeadm join 192.168.37.48:6443 --token 8hp10q.i4ln2b1ogof374aj --discovery-token-ca-cert-hash sha256:6a59c9b03fa971aef94d61a4f4c1a6b085308f88aab4db1a4affda8d65987867
[root@kubernetes3 ~]#  kubeadm join 192.168.37.48:6443 --token 8hp10q.i4ln2b1ogof374aj --discovery-token-ca-cert-hash sha256:6a59c9b03fa971aef94d61a4f4c1a6b085308f88aab4db1a4affda8d65987867
Wait for some minutes and login to the master node. Run the below command again to verify if the nodes have joined the cluster.
kubectl get nodes
kubectl get pods --all-namespaces

[root@kubernetes1 ~]# kubectl get nodes
NAME                        STATUS   ROLES    AGE     VERSION
kubernetes1.oslo.sysco.no   Ready    master   12m     v1.13.1
kubernetes2.oslo.sysco.no   Ready    <none>   5m37s   v1.13.1
kubernetes3.oslo.sysco.no   Ready    <none>   4m4s    v1.13.1

[root@kubernetes1 ~]# kubectl get pods --all-namespaces
NAMESPACE     NAME                                                READY   STATUS    RESTARTS   AGE
kube-system   coredns-86c58d9df4-kjmxn                            1/1     Running   0          63m
kube-system   coredns-86c58d9df4-lfx4p                            1/1     Running   0          63m
kube-system   etcd-kubernetes1.oslo.sysco.no                      1/1     Running   0          62m
kube-system   kube-apiserver-kubernetes1.oslo.sysco.no            1/1     Running   0          62m
kube-system   kube-controller-manager-kubernetes1.oslo.sysco.no   1/1     Running   0          63m
kube-system   kube-flannel-ds-amd64-gm72r                         1/1     Running   0          56m
kube-system   kube-flannel-ds-amd64-mjn4j                         1/1     Running   0          55m
kube-system   kube-flannel-ds-amd64-nhz9b                         1/1     Running   0          58m
kube-system   kube-proxy-2qqjc                                    1/1     Running   0          56m
kube-system   kube-proxy-l69ld                                    1/1     Running   0          63m
kube-system   kube-proxy-w8rfz                                    1/1     Running   0          55m
kube-system   kube-scheduler-kubernetes1.oslo.sysco.no            1/1     Running   0          62m
kubernetes2 and kubernetes3 have been added to the kubernetes cluster.
Note : Please note again that no application will be deployed onto master node kubernetes1.oslo.sysco.no. The master will only be utilized for coordination between nodes.
5. Deploying and Testing services.
Now we have successfully setup our kubernetes cluster, its time to deploy some application and test them.
Note :
- Before we proceed, its important to understand that for on-premise kubernetes cluster, service-type = “LoadBalancer” will not assign a static IP address. That option is only available for Cloud providers like AWS and GCP which can easily hook on the events generated and create a LoadBalancer to provide an external IP. For more details check out the details provided here.
- All the kubernetes command would be run on master node. The pods, deployments and services can only be created via
kubectlon the master node.
In this example, we will create a simple nginx deployment, expose the deployments as service of type=”NodePort”. This will schedule our pods on kubernetes nodes and give them a random port, we will be able to access the services scheduled on the different nodes.
Before starting login to the master node via ssh. We will operate from the master node to deploy and test.
Create deployments
From the master node, run below command to create a standalone nginx deployment on kubernetes:
kubectl create deployment nginx --image=nginx
This will create a single deployment on the cluster. What we want is to have atleast 2 replicas for this deployment so that we can test the deployment on both nodes. In order to do this, we need to change the existing deployment configuration and change replica from 1 to 2. Run the command below and change “spec.replicas” property to 2.
kubectl edit deployment nginx
kubectl will give you a confirmation that deployment configuration is edited. You can also confirm the number of running pods as 2.
[root@kubernetes1 ~]# kubectl edit deployment nginx
deployment.extensions/nginx edited

[root@kubernetes1 ~]# kubectl get pods
NAME                   READY   STATUS    RESTARTS   AGE
nginx-5c7588df-bhgvl   1/1     Running   0          22m
nginx-5c7588df-vvs55   1/1     Running   0          23m
Expose deployement as service
In order to access the nginx pods, we need to expose them as a service. Use the following command to expose nginx deployment as service.
kubectl create service nodeport nginx --tcp=80:80
This will expose our deployments as service available on the 2 nodes. The port will be a random port (default: 30000-32767), and each Node will proxy that port (the same port number on every Node) into your Service.
You can check the status of your service as below.
[root@kubernetes1 ~]# kubectl get svc
NAME         TYPE        CLUSTER-IP     EXTERNAL-IP   PORT(S)        AGE
kubernetes   ClusterIP   10.96.0.1      <none>        443/TCP        3d22h
nginx        NodePort    10.98.240.53   <none>        80:32701/TCP   21m
Testing the services
The service nginx is now available on both the nodes. From the master node run the below commands to send http request on port 32701.
curl kubernetes2.oslo.sysco.no:32701
curl kubernetes3.oslo.sysco.no:32701
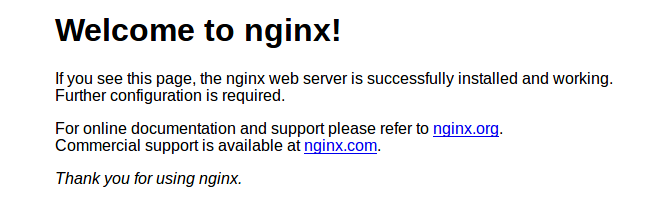
In both the cases you will get a response like below:
<!DOCTYPE html>
<html>
<head>
<title>Welcome to nginx!</title>
<style>
    body {
        width: 35em;
        margin: 0 auto;
        font-family: Tahoma, Verdana, Arial, sans-serif;
    }
</style>
</head>
<body>
<h1>Welcome to nginx!</h1>
<p>If you see this page, the nginx web server is successfully installed and
working. Further configuration is required.</p>

<p>For online documentation and support please refer to
<a href="http://nginx.org/">nginx.org</a>.<br/>
Commercial support is available at
<a href="http://nginx.com/">nginx.com</a>.</p>

<p><em>Thank you for using nginx.</em></p>
</body>
</html>
These service can also be accessed from outside using browser or terminal. To quickly test, we can use the terminal on our local machine and run below command.
prakhar@tardis:~|⇒  curl 192.168.37.49:32701
prakhar@tardis:~|⇒  curl 192.168.37.50:32701
In both the cases, we will get an output similar to above. On accessing the urls via browser, you should see an output like below
Our kubernetes setup is ready to be used.
6. Accessing kubernetes cluster from local machine
So far we have configured our cluster and we can make deployements via kubectl. But to do that we need to login to our master node. It is actually possible to proxy connections to master from local machine run administer master from localhost. We need to perform below steps in order to enable that configuration.
Install kubectl on local machine
If you are using a debian based local machine like me, you can use the below steps to install kubectl on your local machine.
sudo apt-get update && sudo apt-get install -y apt-transport-https
curl -s https://packages.cloud.google.com/apt/doc/apt-key.gpg | sudo apt-key add -
echo "deb https://apt.kubernetes.io/ kubernetes-xenial main" | sudo tee -a /etc/apt/sources.list.d/kubernetes.list
sudo apt-get update
sudo apt-get install -y kubectl
If you are using other operating system, the steps to install kubectl for your OS are defined here.
Copy kubernetes configuration from the master
You can manually copy the config file $HOME/.kube/config on your master node and save it locally. If you are using linux based system, you could run the below command to copy the file from master locally.
scp root@192.168.37.48:/etc/kubernetes/admin.conf .
This will copy the admin.conf file from remote master to your current directory. Make sure to replace the IP above with IP of your master node. You would be prompted to enter the password.
Proxy connections to master using kubectl proxy
Now that we have the config file, we can connect to the master by following below steps.
Open a terminal and proxy the kubectl connections to master. Remember to point to the admin.conf file that we have downloded in previous step.
kubectl --kubeconfig ./admin.conf proxy
You should get an output like below
prakhar@tardis:~|⇒  kubectl --kubeconfig ./admin.conf proxy
Starting to serve on 127.0.0.1:8001
Connect to master using admin.conf
Now you can connect to the master node using kubectl like below.
prakhar@tardis:~|⇒  kubectl --kubeconfig ./admin.conf  get pods
NAME                   READY   STATUS    RESTARTS   AGE
nginx-5c7588df-bhgvl   1/1     Running   0          45h
nginx-5c7588df-vvs55   1/1     Running   0          46h

prakhar@tardis:~|⇒  kubectl --kubeconfig ./admin.conf  get nodes
NAME                        STATUS   ROLES    AGE     VERSION
kubernetes1.oslo.sysco.no   Ready    master   4d20h   v1.13.1
kubernetes2.oslo.sysco.no   Ready    <none>   4d20h   v1.13.1
kubernetes3.oslo.sysco.no   Ready    <none>   4d20h   v1.13.1
Now you will be able to connect and deploy applications from localhost.
7. Where to go from here
In this blog post we have only touched the surface of setting up kubernetes. As mentioned before, kubernetes provides varities of services which we have not focussed on here. Some of good to have features include load balancing an on-permise kubernetes cluster, security considerations, optimizing cluster for DevOps and many more.
We will cover these concepts in upcoming blogs. For those of you who are interested to read further here are some quick links from kubernetes website that might help:
- Verify that your cluster is running properly with Sonobuoy.
- Learn about kubeadm’s advanced usage in the kubeadm reference documentation.
- Learn more about Kubernetes concepts and kubectl.
- Configure log rotation. You can use logrotate for that. When using Docker, you can specify log rotation options for Docker daemon, for example
--log-driver=json-file --log-opt=max-size=10m --log-opt=max-file=5. See Configure and troubleshoot the Docker daemon for more details.
8. Sources and References.
- kubernetes website : kubernetes.io
- kubernetes with ansible : k8s-ansible
- kubernetes configuration best practices : best-practices
- using flannel with kubernetes: k8s-flannel
- this blog post : centos-k8s